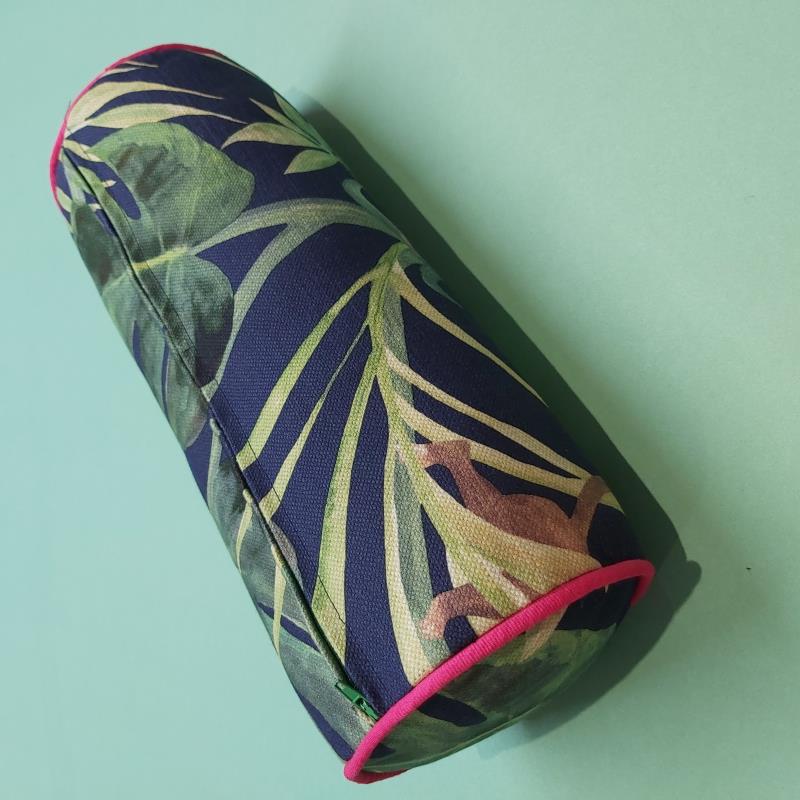
So this is how to make a professional finish Bolster cover with zip fastening and optional piping detail.
In this post I will share a link to my PDF pattern download to use alongside these instructions, but if you don’t yet have a bolster inner or you already have one at home that you wish to cover – Refer to my previous post on How to measure and make a Bolster Cushion from scratch, this includes a method for calculating the circumference of the ends etc.
Before getting started I would suggest that you get your hands on or make the bolster cushion inner pad before attempting this zipped cover just to confirm the measurements before you decide on size.
If you are looking to buy one I found some available in the same sizes 6/7/8″ on Amazon HERE the measurement refers to the diameter of the ends.
If you are using my PDF sewing pattern you will get the choice to make a standard Small (6″), Medium (7″) or Large bolster (8″)
The Kit you will need is listed below

Fabric + Zip:
In the sample I used a medium weight décor cotton from Clarke and Clarke but any medium weight woven will work well. Note don’t go too thick as this will prove tricky if/when piping.
- Small 6” – 50 x 45cm Fabric + 12” zipper
- Medium 7” – 60 x 50cm + 16” zipper
- Large 8” – 65 x 55cm + 18” zipper
Optional piping – If you need to make your own piping refer to a previous Blog post I published called Make Bias binding this will show you how to also make piping.
- S – 100cm (40″)
- M – 112cm (44″)
- L – 120cm (47″)
Tools required
- Sewing machine – I’m using Janome 230DC
- Optional overlocker/serger – I’m using Janome 6234XL
- Zipper foot
- Fabric and Paper scissors
Get the print at home PDF pattern
There are 8 A4 pieces to print in total , 6 of which are the MAIN body of the cushion which will need to be cut and pieced together like a jigsaw.

- Alternatively if you do not wish to print out the MAIN body pieces of the pattern you can also draft a rectangle of the following sizes to use alongside the END CAP pattern piece: S – 35 x 42cm/ M – 42 x 49cm / L – 49 x 56cm
So gather your materials and if you have everything ready – Let’s get started
1. CUT OUT 1 main on fold and 2 end circles
Note – if your fabric is fraying consider overlocking the raw edges now.
2. SEW MAIN long edges RST (Right sides together) using a LONG stitch length.

PRESS seams open

3. Fold fabric to the side and lay zip face down along your seam. Attach ZIP to one side of your seam allowance using ZIPPER FOOT

REPEAT on the other side of the zip

4. PRESS and then rip open the center seam to reveal your zip

5. OPEN ZIP and TOP STITCH either side of your zip using zipper foot

6. OPTIONAL – Attach piping loosely to each end cap using zipper foot matching raw edge to edge (How to make piping)


7. END CAPS – attach end caps to the main piece matching NOTCHES to help you ease the curve of the circle to the straight end
NOTE – Sew slowly pushing into the piping using zipper foot

Turn through and MARVEL at your handiwork!
Using the zip method above you have created a neat hidden zip (pattern matching that seam was not intentional, but I suspect that the pattern repeat of the print is similar to the circumference of my circle LOL)

My Small pattern size makes a great little bolster or lumber cushion and the Large works well as Yoga cushion.

I hope that you enjoyed this project I have so many ideas about how to use this pattern in different ways, please do share your ideas with me on Instagram @Frecklesandcocraft #Frecklesbolster


