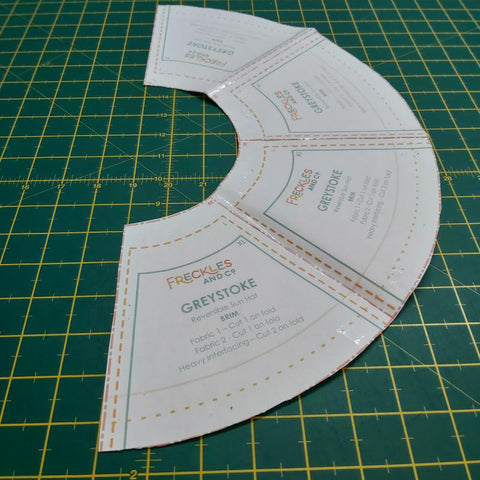
Here's the instructions for my Greystoke Sun Hat Sewing pattern, this design has a nice deep cap and really wide brim for extra sun protection (or so people can't see you rolling your eyes).
Use this tutorial by scrolling down through the photos and following the simplified steps. Alternatively checkout my video tutorial on YouTube
This pattern comes in 5 sizes from XS (48cm) - XL (60cm) so that you can also make for older children, tbh my kids kept stealing the sample so I thought it might be a winner in all sizes.
To make this project you will need some light to medium weight woven fabric in 2 nice designs because this beauty is REVERSIBLE. And you will also need some heavy interfacing for the wide brim.
Here's how to make the #Greystoke Sun Hat and some top tips for success.
Kit List:
MATERIALS
- 2 woven Fabrics
- Heavy weight interfacing
- Threads co-ord or contrast your choice
TOOLS
Grab the PDF pattern templates in my Pattern Shop
Also see illustrated instructions below which you can choose to print or not (you could save paper/ink and view the illustrations on screen).
Let's get started!
Firstly cut out your pattern templates and for this one you will need to print x4 of the brim template in order to stick them together so that you can cut each brim on the fold.

Next gather all your materials and, cut out your fabrics and choose your threads.
This pattern INCLUDES 1/4" seam allowances
(1) CUT OUT all your pieces in total - Cap x12 / Brim x2 on fold

(2) Fabric 1 - Construct the cap by joining 6 segments together
Join 3 pieces twice and then join the 2 halves to make one cap. Press seams open after every seam for best finish.


(3) Fabric 1 - Stiffen the BRIM with heavy weight interfacing fusible (iron on) or sew in. Use your fabric brim as a template for interfacing.
The brim on this design is wide so it needs help to prevent excess flopping.

TOP TIP when using fusible cut the interfacing slightly smaller than the fabric so as not to fuse to your ironing board/mat.

(4) Join CAP to BRIM using notches to align.

(5) Repeat all above steps with with fabric 2 to make a second hat.
(6) JOIN hats RST (right sides together) sewing all around outer edge of the brims.
Leave a 4" gap to turn the hat through. Be sure to backstitch (reverse) at beginning and end of seam otherwise you will rip open the seam when turning through next.


Turn your hat through the right way out. This will seam impossible but go slow and be patient.

Try it on for fit and to check all seams before closing up the gap

PRESS gap seams in, try to round the edge as best as possible.

(7) Top stitch edge of brim with long stitch length (5mm) use a twin needle if you have one. And then top stitch inner brim through all layers to really secure the two hats together.


I hope that you like this pattern as much as I do, share your creations with me on Instagram #greystokesunhat #frecklessewingpatterns
Looking for more sewing patterns?
See me making the Greystoke on You Tube


