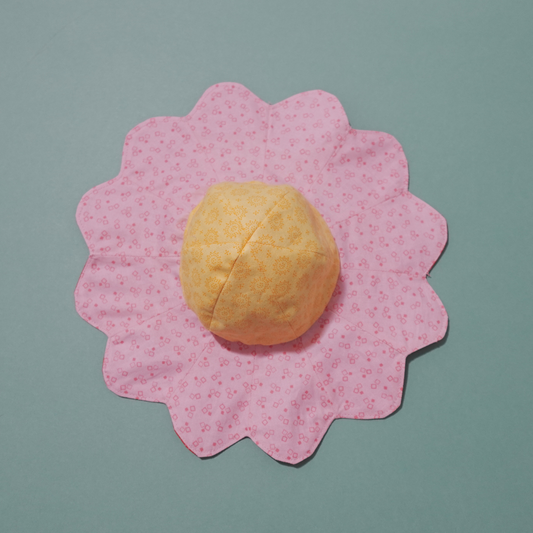
This Rainbow pouffe was inspired by my Three Bears Floor Cushion and I thought it would make a fabulous CUT&SEW panel.

Pre-printed fabric panels are such a great way to sew. No tricky placement problems and all the colours have been chosen for you, plus you usually get some cheeky little extras from the designer by way of labels or motifs.
This rainbow pouffe makes up around 40cm (16") wide by 20cm (8") high.
Get your hands on one of these panels over at SPOONFLOWER

Extras you'll need for this project:
- 14" Zipper
- Stuffing (Beans, scraps or filler)
Find advice on different ways to fill your pouffe on my BLOG
TOP TIPS:
- Iron your panel before starting
- Before you start sewing trace the pattern piece templates and you can make more cushions in other fabrics.
- If you would like to embroider the top panel of your pouffe do this now before you start
Ready? Let's get started!
1> Firstly cut out all your pieces following the faint white dashed line around the templates.

Note there is 1cm seam allowance included in these pieces with a 0.5cm bleed in colour to account for wobbly sewing (which happens to us all!)
SIDES
2> Start sewing side panels RST starting Red/Orange/Yellow and so on...
Notice the white dot at the base of each so that you keep all panels the correct way up as the base is slightly wider than the top.

PRESS seam allowances open

Continue until you join first to last panel and create a ring.

TOP
3> Baste top backing to patterned top along the colour bleed.

Join TOP hexagon piece to the midsection with 1.5cm seam allowance, using corners to fit the pieces together neatly.
TOP TIP - Stop at each corner with needle down and pivot organising the fabric layers at each edge.

PRESS into corner joins


BASE
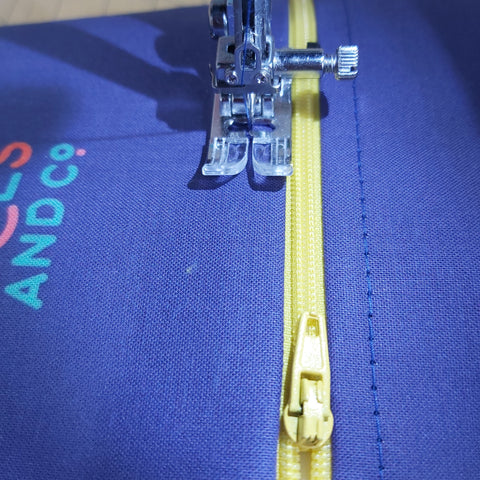
4> ATTACH ZIPPER to longest edge of each BASE piece using a zipper foot.

Attach zip face/teeth down onto right side of fabric.

TOP STITCH for a nice flat finish.
(I usually topstitch using stitch size 4-4.5mm)

5> OPEN ZIP halfway and attach the zipped BASE to your pouffe midsection.
Be sure to pull the zip ends closed together as you sew over the zip tape.
TOP TIP - Sew with the base on the bottom and midsection panels on top.

* There are a couple of DIY labels included on this panel. If you want to add one to your pouffe add them into the seam now.


I'll be adding to my collection of CUT&SEW panel designs so check HERE to see them all together.